 |
|  |
|  |
|  |
| 
E-mail: kobol@jfbathroom.com

Tel: (86)768-2992129


NEWS CENTER
—
How do I measure my old toilet to make sure the new replacement fits perfectly

Upgrading your bathroom with a modern fixture should be an exciting renovation—not a frustrating lesson in plumbing mismatches. Few things are more disappointing than unboxing a premium replacement toilet only to discover that the rough-in distance is two inches off or the bowl prevents your bathroom door from opening fully. Taking precise measurements before you shop is the single best way to avoid return shipping hassles, restocking fees, and unexpected plumbing retrofits.
At Joy & Fortune, as a dedicated manufacturer of premium ceramic sanitary ware and smart toilets, we know that a flawless installation starts long before the plumbing work begins. To take the guesswork out of your bathroom upgrade, our engineering and product teams have created this step-by-step measurement guide. Below, you will learn how to determine your exact rough-in size, evaluate surrounding spatial clearance, and match your metrics to the perfect replacement model with complete confidence.
Essential Tools and Preparation Before Measuring Your Toilet
Accurately measuring a toilet requires a small amount of preparation before you pull out the tape measure. Understanding your bathroom's spatial constraints—especially the critical rough-in dimension—and gathering the right tools ahead of time ensures you capture precise figures on your first try. Best of all, you don't need to remove your existing fixture to get started. By clearing your workspace and identifying key measurement points around the base, you can easily set the stage for a seamless, stress-free replacement process.
What Tools You Need for Accurate Toilet Measurements
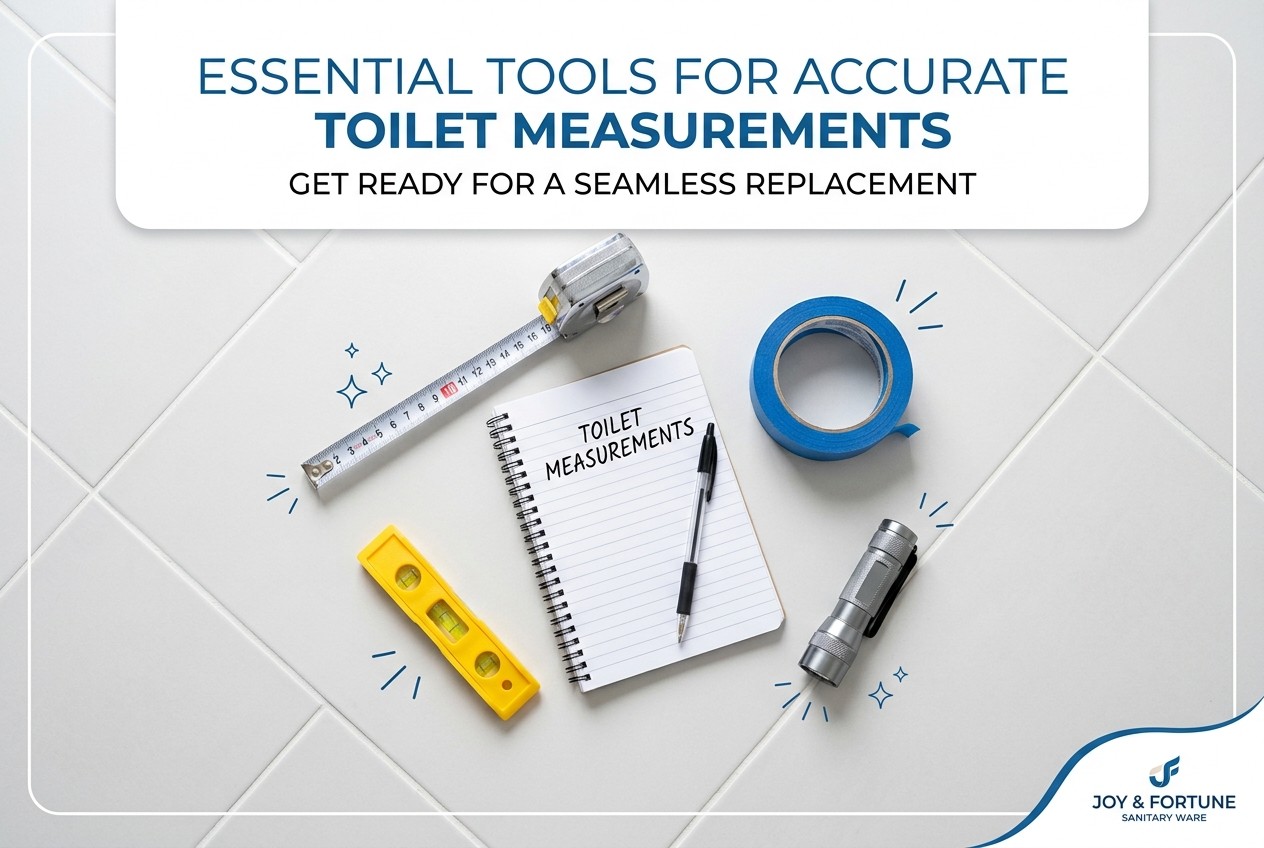
Before measuring, gather these essential tools to capture precise dimensions and avoid extra trips to the hardware store:
l Flexible Measuring Tape: A standard 16-to-25-foot metal tape measure with a locking blade guarantees precise wall-to-bolt readings.
l Notepad and Pen: Record overall height, width, depth, and rough-in figures immediately to eliminate guesswork.
l Painter's Tape: Mark key measurement points on the tile or wall without damaging bathroom finishes.
l Small Bubble Level: Verify floor levelness to anticipate if your new base will require shims.
l Flashlight: Easily locate hidden closet bolt caps and tight water supply line connections behind the bowl base.
Understanding the Rough-In: The Most Critical Dimension
The toilet rough-in is the distance between the finished back wall and the center of the floor drain (closet flange). It is the single most critical measurement when replacing a toilet—buying an incorrect rough-in size prevents proper installation or leaves awkward gaps.
While the standard US rough-in distance is 12 inches, older homes or custom layouts may feature 10-inch or 14-inch configurations. Always measure directly from the wall surface—not the baseboard or trim—to the center of the closet bolts securing the toilet base. Matching this exact dimension ensures your replacement aligns perfectly with existing plumbing waste lines without requiring costly pipe relocations.
Pre-Measurement Checklist: Preparing Your Existing Toilet
You do not need to remove your old toilet to measure for a replacement. Completing a quick prep checklist ensures accurate readings without unnecessary plumbing work:
l Clear the Surrounding Area: Remove bath mats, wastebaskets, and toilet paper holders to maintain an unobstructed line of sight.
l Locate Floor Bolt Caps: Identify the plastic covers at the toilet base. These mark the exact center of the floor flange underneath.
l Identify Multi-Bolt Setups: If your fixture has four floor bolts, measure to the rear pair closest to the wall.
l Account for Wall Trim: Note thick baseboards or tile wainscoting that might alter measurements taken from the true wall surface.

Step-by-Step Guide to Measuring Key Toilet Dimensions
With your workspace prepared and tools in hand, capturing your toilet’s exact dimensions is a straightforward process. To ensure your new fixture aligns seamlessly with your plumbing and fits comfortably within your floor plan, you must measure three core metrics: the rough-in distance, the bowl shape and depth, and the total physical footprint (including height, width, and seat height). Follow this step-by-step guide to record precise numbers before shopping for your replacement.
How to Measure the Rough-In Distance Correctly
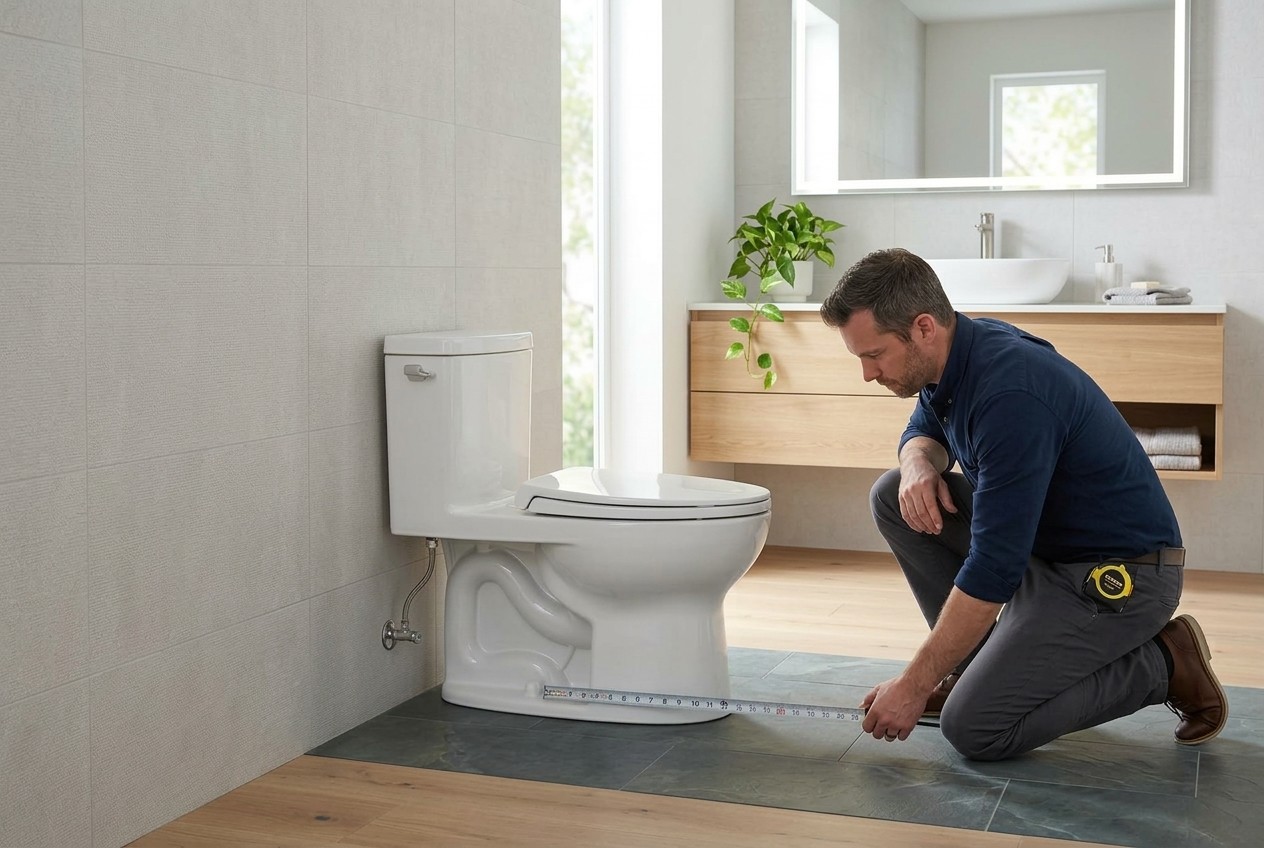
To measure your toilet’s rough-in accurately, follow these concise steps:
l Locate the Floor Bolts: Find the plastic bolt caps on the side of the toilet base that secure the fixture to the floor flange.
l Measure from the Finished Wall: Extend your tape measure from the drywall or back wall straight to the center of the bolt. Never measure from baseboards, molding, or trim.
l Account for 4-Bolt Models: If your base has four bolts, measure directly to the rear pair closest to the wall.
l Determine the Standard Size: Round your reading to the nearest standard rough-in measurement: 10 inches, 12 inches (most common), or 14 inches.
Determining Bowl Shape and Depth (Round vs. Elongated)
Toilet bowls come in two primary shapes: round-front and elongated. Identifying your bowl style ensures your replacement fits comfortably within your space and accepts the correct toilet seat.
To determine your bowl shape, measure from the center of the seat hinge bolts (where the seat attaches to the bowl) to the outermost front edge of the rim:
l Round Bowls: Measure approximately 16.5 inches. Compact round designs conserve floor space, making them ideal for small bathrooms and powder rooms.
l Elongated Bowls: Measure approximately 18.5 inches. Oval elongated bowls extend further into the room, offering superior ergonomic comfort.
If your measurement falls between these values, round up to the nearest standard size.
Measuring Overall Height, Seat Height, and Tank Width
Measuring vertical and horizontal dimensions ensures your new toilet fits overhead space and personal mobility requirements:
l Overall Height: Measure from the floor straight up to the top of the tank lid. Check this figure against low-hanging wall cabinets, shelves, or towel racks.
l Seat Height: Measure from the floor to the top of the toilet seat. Standard bowls sit at 15 to 16 inches, while Chair Height (ADA Compliant) models measure 17 to 19 inches for easier standing and sitting.
Tank Width: Measure across the widest edge of the tank lid from left to right to prevent spatial conflicts with adjacent bathroom vanities or side walls.

Accounting for Bathroom Clearance and Surrounding Fixtures
Even if a replacement toilet matches your rough-in, it won't function well if it clashes with surrounding bathroom elements. Accounting for spatial clearance around side walls, front walkways, and cabinet doors ensures your new fixture meets local building codes and provides comfortable daily use. Additionally, verifying the exact position of your water supply valve prevents frustrating installation conflicts—especially when upgrading to wider or skirted models. Here is how to accurately evaluate your bathroom's spatial boundaries before buying.
Measuring Clearance from Side Walls and Cabinets
Adequate lateral space is essential for daily comfort and local plumbing code compliance. Standard building codes mandate a minimum clearance of 15 inches from the toilet's centerline to any side obstruction, such as a vanity, wall, or shower glass.
To verify your bathroom's side clearance:
l Locate the Centerline: Measure from the center of the closet bolts (or bowl) to the nearest adjacent fixture or wall.
l Calculate Total Alcove Width: Ensure your toilet space provides at least 30 inches of total clear width from side to side.
Aim for Extra Comfort: If space allows, target 18 inches from the centerline (36 inches total) for an upgraded, spacious layout.
Checking Front Clearance for Door Swings and Walkways
Sufficient space in front of your toilet guarantees comfortable legroom and prevents frustrating collisions with surrounding doors. Plumbing codes mandate a minimum of 21 inches of clear space in front of the toilet bowl, though 24 to 30 inches is recommended for ideal comfort.
To verify your front clearance:
l Measure from Front Rim: Measure from the center of the floor bolts forward, adding your target bowl depth to calculate where the front edge will land.
l Test Door Arcs: Fully open entry doors, shower glass, and vanity drawers to ensure their swing paths clear the front of the fixture.
l Account for Upgrades: Remember that switching from a round to an elongated bowl extends the toilet 2 inches further forward into your walkway.
Locating and Measuring the Water Supply Line Position
Don’t overlook your water shut-off valve—valve placements that work for standard toilets can obstruct modern wide-base or skirted models with concealed trapways.
To verify supply line compatibility:
l Measure from Centerline: Measure horizontally from the centerline of the closet bolts to the shut-off valve stem. Valves typically sit 6 to 10 inches to the left.
l Check Height Above Floor: Measure vertically from the floor to the center of the valve, usually 6 to 8 inches high.
l Verify Skirted Clearance: Compare these figures against your target toilet’s specification sheet to ensure the full porcelain skirt will not overlap or press against the valve during installation.

Matching Your Measurements to the Right Replacement Toilet
Now that you have gathered your exact measurements and verified your bathroom's spatial clearance, it is time to translate those numbers into the right product choice. Whether you are selecting a standard 12-inch rough-in, evaluating ADA-compliant comfort height models, or opting for a sleek skirted design for easier cleaning, aligning your measurements with manufacturer specifications prevents costly return fees and installation delays. Review these final selection guidelines and pre-purchase checklist to make your buying decision with complete confidence.
Standard Toilet Rough-In Sizes (10”, 12”, and 14”)
Once you have your rough-in measurement, match it directly to one of three standard market dimensions:
l 12-Inch (Most Common): Found in over 90% of modern homes, offering the widest selection of models, styles, and price points.
l 10-Inch (Compact/Remodel): Often required in older homes, basement conversions, or small powder rooms with tight plumbing configurations.
l 14-Inch (Spacious/Historic): Found in vintage homes or rooms designed with extra distance between the wall and flange.
Key Takeaway: Buying a toilet that matches your exact rough-in size prevents major installation issues. Putting a 10-inch toilet on a 12-inch rough-in creates an awkward 2-inch gap behind the tank, while a 12-inch model won't fit a 10-inch rough-in at all.
Choosing Between Standard Height, Comfort Height, and Skirted Models
Matching your measured dimensions with the right toilet design ensures long-term ergonomic comfort and easy cleaning:
l Standard Height (15–16 inches): Traditional rim-to-floor height best suited for children, shorter individuals, or general family bathrooms.
l Comfort / ADA Height (17–19 inches): Mirrors standard chair height, making sitting and standing significantly easier for taller adults, seniors, or those with mobility concerns.
l Skirted vs. Exposed Trapways: Skirted models feature smooth, continuous porcelain sides that conceal the trapway. They offer a sleek aesthetic and eliminate hard-to-clean crevices, but demand precise water supply line placement due to their wider base clearance requirements.
Final Checklist Before Purchasing Your Replacement
Before clicking 'buy' or heading to the store, double-check your recorded measurements against the manufacturer's specification sheet using this quick checklist:
l Rough-In Match: Does the toilet's specified rough-in (10', 12', or 14') match your floor flange distance exactly?
l Door and Drawer Clearance: Will opening doors, vanity drawers, or shower glass clear the front rim (at least 21 inches of clear front space)?
l Supply Line Position: Is your shut-off valve positioned to avoid colliding with wide bases or skirted sides?
l Overhead Clearance: Does the total height leave enough room beneath low-hanging cabinets or shelves?
Verifying these four core specs guarantees a seamless, single-try installation.

Replacing a toilet doesn't have to be a daunting project. By following these step-by-step measurement guidelines—from verifying your rough-in distance to checking side clearances and water supply valve positioning—you eliminate the guesswork and ensure your new fixture installs smoothly on the first try.
At Joy & Fortune, we take pride in manufacturing precision-engineered ceramic sanitary ware, sleek skirted designs, and advanced smart toilets built to exact spatial specifications. Whether you are performing a simple guest bath replacement or executing a full modern bathroom upgrade, starting with accurate dimensions guarantees a stress-free transformation. Explore our comprehensive collection of Joy & Fortune sanitary solutions today, or contact our team of experts to find the perfect fit for your home project.

Related news
-

Public bidets vs. traditional toilet paper: Which is hygienic in a shared restroom
Stepping into a high-traffic shared restroom often comes with a subtle hesitatio
-
What are the best toilet brands for reliability, durability, and budget?
Few fixtures in your home work harder or impact your daily comfort more than the
-
How do I measure my old toilet to make sure the new replacement fits perfectly
Upgrading your bathroom with a modern fixture should be an exciting renovation—n
-
What does "toilet rough-in" mean, and how do I measure mine in 2 minutes?
A toilet rough-in is the clearance distance measured from the finished wall behi
-
Why are cheap bathroom vanities so cheap? Hidden traps like low-grade particle board and missing tops.
At first glance, an ultra-low price tag on a brand-new bathroom vanity feels lik
-
Big-box home store vs. online discount retailers: Where do you get the best deal on bathroom vanities?
Upgrading your bathroom vanity is one of the most impactful choices in any renov



Premium sanitary ware manufacturer since 1992. Delivering reliable global B2B solutions.


Contact
Address: No. 12, Guayuan East Road, Changmei Second Village, Fengxi District, Chaozhou City, Guangdong Province, China
Email: kobol@jfbathroom.com
WhatsApp/Tel: [+86-135-3399-8998]
Working Hours: Mon - Sat: 9:00 AM - 6:00 PM (UTC+8)
Copyright © 2026 Joy&Fortune Ltd. All Rights Reserved.


